Bathrooms punish houses. Hot showers push warm, moisture-laden air into the smallest room in the home, then that air hunts for the coldest surfaces. Mirrors fog, paint peels, and grout lines darken along the lower grout joints first, where water vapor condenses and lingers. A properly sized, properly vented exhaust fan changes that story. It pulls humid air out before it condenses, dilutes odors, and protects framing and finishes. When a fan is wrong for the room, installed poorly, or vented into an attic, it can do more harm than good. The details make or break the outcome.
Why bathroom ventilation matters more than paint and tile
Moisture is the enemy of finishes and structure. A typical 10-minute hot shower can add a pint or more of water to the room’s air. If you do not exhaust it, that water ends up in the drywall, trim, and insulation. Over a season, you will see paint blister along window casings, mildew bloom on caulk joints, and swollen MDF baseboards. Over a few years, you will smell mustiness in adjacent closets, then find darkened roof sheathing where the bathroom’s warm, wet air found a path into the attic.
Ventilation also affects indoor air quality in less obvious ways. Bathrooms store cleaning chemicals, aerosols, and personal care products that off-gas VOCs. In tight homes, especially those wrapped and sealed to meet modern energy standards, an exhaust fan becomes the pressure relief valve that keeps contaminants and excess humidity from building. The fan does not replace a whole-house ventilation plan, but it carries a disproportionate load relative to its size.
Sizing a fan properly, and what the numbers really mean
Package labels often highlight CFM, or cubic feet per minute. The old rule of thumb is 1 CFM per square foot of bathroom floor area for rooms up to 100 square feet, then add 50 CFM for each enclosed fixture beyond the first - the shower, the tub, the water closet in its own compartment. In practice, this baseline can underperform if the ceiling is high, the duct run is long, or the room carries a steam shower or multiple showerheads. If you have a standard 5 by 8 bath with an 8-foot ceiling, a 50 to 80 CFM fan usually works. If the ceiling hits 10 feet, you are asking the same motor to move air through 25 percent more volume. Bump capacity to 80 to 110 CFM and pay attention to the duct.
Noise ratings matter too. Sones describe perceived loudness. At 1.0 sone or less, you will barely notice a hum. Between 1.5 and 2.0, you can hear the fan yet hold a conversation. Anything above 2.5 often goes unused because it sounds like an old box fan. I have seen gleaming new baths with a 3.5-sone unit that no one ever switches on. Quiet fans run more often, which keeps bathrooms dry. In many remodels, we target 80 to 110 CFM at 0.8 sone or lower for a primary bath, and 50 to 80 CFM at 1.0 sone or less for a powder room.
Static pressure curves hide in the fine print and tell you how the fan will behave once connected to a real duct with elbows and a roof cap. A fan rated at 110 CFM free air might deliver only 70 CFM through a 20-foot run with two 90 degree bends and a hood with a sticky damper. Pick models with published performance at 0.25 inches water gauge and match that to your duct layout. It is one of the easiest ways to avoid a wet mirror and a frustrated homeowner.
The path out matters: ducting choices and terminations
The shortest, straightest path wins. Smooth-walled metal duct, sized to the fan’s outlet, moves air more efficiently than flexible duct. If you must use flex, pull it taut and support it so it does not belly, where condensate will collect and restrict flow. Length increases resistance, elbows increase it even more, and cold runs through unconditioned spaces risk condensation inside the duct. In cold climates, we insulate bathroom fan ducts passing through attics. Without insulation, warm moist air cools, water condenses, and the duct drips back into the fan housing, a problem that shows up as a mysterious ceiling stain in February.
Where you terminate the duct matters just as much. Roof, side wall, or soffit are all viable if done correctly, but never dump bathroom air into an attic, crawlspace, or garage. A louvered wall cap or roof cap needs a backdraft damper that actually moves. Cheap dampers stick, and when they stick, cold air drops into the room and the fan struggles to overcome the blockage. On the outside, a small bead of sealant at the cap’s perimeter and proper flashing keep water out of the building. Inside, seal the duct seams with foil tape or mastic. Air leaks reduce delivered CFM and can send moisture into cavities.
Placement in the room, and how it changes performance
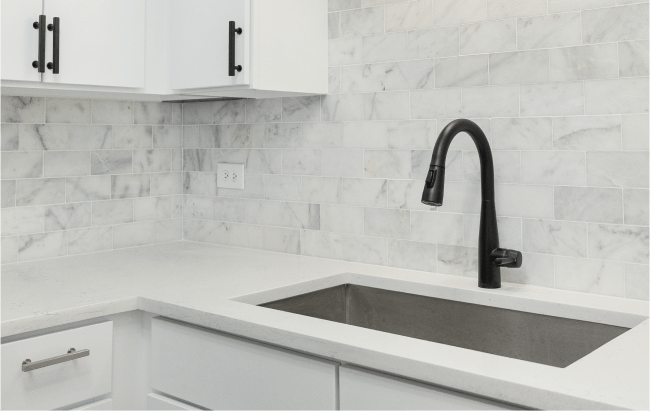
Mounting the fan directly over a shower captures steam at the source. Many manufacturers offer wet-rated housings for this location, and code requires the fan to be on a GFCI-protected circuit when above a shower or tub. For a single central fan serving a small bath, center the grille in the ceiling where it can draw across the entire room. In larger primary baths, two smaller fans often beat one large one. Place one over or near the shower and another near the water closet enclosure. They can share a switch or run on independent controls, depending on how the room is used.
Make up air is the other half of placement. A fan cannot exhaust what it cannot replace. Undercut the bathroom door by at least 1/2 inch, or provide a transfer grille if the bath has an exterior door that tends to stay closed. In tight homes, an exhaust-only approach can momentarily depressurize the bath. That is fine if the door allows air to flow from the hallway. If not, the fan will pull air down a chimney or from another unwanted path.
Switches, sensors, and why controls matter
The best fan still fails if it never runs long enough. Moisture lingers for 15 to 30 minutes after a hot shower. Humidity-sensing controls solve the habits problem, triggering the fan when relative humidity rises and keeping it on until the levels drop. Look for sensors that you can calibrate. In a compact bath, set it around 50 to 60 percent RH. Timers also work well, especially in kids’ baths where the fan needs to outlast the shower by a good margin. A simple 30, 45, or 60 minute preset reduces the chance someone switches the fan off too early.
![]()
Integrated light and fan combos can complicate control. If one switch controls both, people turn the light off when they leave, and the fan turns off with it. Split the functions. Use a dual switch or a separate humidity control so the fan can stay on while the room is empty.
What can go wrong, and how to spot it
Two issues account for most callbacks. First, fans that do not deliver rated CFM in real conditions. The signs are fogged mirrors, slow-to-dry towels, and a damp smell that lingers after the shower. Walk the exterior during operation and check the damper. If there is no noticeable airflow, or the damper barely opens, you have a duct restriction, a damper problem, or a fan that cannot overcome the static pressure. Second, fans that exhaust into a roof soffit where the moist air is pulled back into the attic. In winter, this feeds frost buildup on the underside of the roof deck, which thaws into spring stains.
Other failures show up in odd ways. A rattling fan can be a loose mounting bracket, a screw dropped into the housing, or a warped plastic wheel. A backdraft in cold weather points to a missing or flimsy damper. Condensation dripping from the grille in January almost always traces to an uninsulated duct passing through a cold attic. Solve the root cause, do not just swap the grille.
Codes, permits, and good practice
Local code drives requirements, but a few common threads appear in most jurisdictions. A fan is required in a bathroom without an operable window, and even with a window, mechanical ventilation is strongly encouraged. Dedicated circuits may be required for combined heat lamp and fan assemblies. GFCI protection is required when the fan is within reach of a shower or tub, and for any fan installed directly above those fixtures. Ducts must terminate outdoors. In older houses, fishing power to a new fan often reveals open junctions, shared neutrals, or knob-and-tube runs. These are the moments to correct legacy wiring rather than work around it.
If your home sits in a city with rigorous inspection culture, such as Chicago, the permit and inspection process adds steps but improves outcomes. Venting to a side wall when a neighboring building sits close by may require specific clearances. Roof penetrations demand proper flashing. Where a bath sits under a flat roof, routing through a joist bay to a rear wall cap may be the cleanest solution. When Revive 360 Renovations renovates older urban homes, we plan fan placement during the schematic phase rather than as an afterthought, so structural and exterior constraints do not force bad choices later.
A practical installation sequence that respects the house
Every house resists change in its own way. Old plaster ceilings do not like to be opened. New truss roofs can hide with bracing that blocks the straight shot you expected. A sound sequence helps avoid surprises late.
- Confirm the load path: choose fan size and location, then map the duct route that avoids sharp bends and long runs. Verify the termination point on the exterior and measure for parts before you cut. Open selectively: use a stud finder and inspection camera to avoid joists and wiring. Cut the smallest opening that still allows you to install the housing and make the connections cleanly. Mount the housing right: anchor to framing so the grille sits flush and the motor is isolated from vibration. Level matters, not for looks alone, but so any incidental condensation drains toward the duct, not back into the room. Build a good airway: connect smooth duct, seal with foil tape or mastic, support runs every few feet, and insulate where the duct runs through unconditioned space. Install a quality cap with a free-moving damper. Commission the fan: verify airflow at the exterior cap by hand feel or with a simple vane anemometer, set the humidity sensor or timer, and smoke-test the room to confirm draw toward the grille.
On occupied remodels, we often cut and patch in a single day so the bathroom stays usable. Dust control counts. Zip walls, negative air with a HEPA filter, and careful vacuuming before you leave protect the rest of the house. If you are juggling multiple trades, slot the fan rough-in alongside electrical and just before insulation and drywall closure.
Real-world lessons from fieldwork at Revive 360 Renovations
We once retrofitted a primary bath with marble walls and a steam unit where the original fan was tucked in a distant alcove. The client complained of lingering moisture despite an expensive fan on paper. During our diagnostic, we found a 25-foot flex duct with four tight elbows that drooped in two places. The fan itself was fine, but it never had a chance. We rerouted the run using rigid 6 inch duct, cut the length in half, and swapped the exterior hood for a low-resistance cap. The fan went from barely opening the damper to lifting it fully. Steam cleared in minutes, and we did not touch the tile. Lesson reinforced: paper CFM is not delivered CFM if the pathway is wrong.
Another project ended with a discolored ceiling patch in February. Our crew at Revive 360 Renovations had installed a whisper-quiet unit in a second-floor hall bath. Everything passed inspection, yet the stain appeared weeks later. We had done one thing inadequately. The attic duct insulation stopped short of the roof cap, and a cold three-inch section near the cap was enough to condense water that ran back to the elbow. We pulled the cap, extended the insulation to the flange, and the problem disappeared. Small gaps invite big nuisance.
When a second fan or a remote fan makes sense
Some bathrooms are better served by a pair of smaller units. A large bath with a private toilet room benefits from a 50 to 80 CFM fan dedicated to that compartment and a separate 80 to 110 CFM fan near the shower. This approach reduces duct length for each run and targets moisture and odor at the source. In homes where noise is a concern, consider an inline remote fan mounted in the attic with two pickup grilles, one above the shower and one near the vanity. The motor sits away from the room, which yields near-silent operation at the grille. You can still use a humidity sensor and timer, and service access in the attic is straightforward.
Inline fans require a little more planning. The duct layout becomes a manifold, and balancing dampers on each branch help dial in draw so the closer grille does not steal all the airflow. The termination remains a single cap sized to the unit’s combined flow. This configuration shines in spa-like baths where the priority is both performance and serenity.
The intersection of fans, energy efficiency, and comfort
A modern, tight building envelope makes good mechanical ventilation more important, not less. If you are planning how to make your home more energy efficient, think of bathroom fans as part of the same conversation as air sealing and insulation. Smart home technology integration during remodeling can automate runtime and data collection. We have tied humidity sensors to whole-house dashboards that show bathroom RH curves after showers, which is a nerdy, surprisingly useful way to confirm that a fan clears a room in under 20 minutes.
Choosing energy-efficient materials for your renovation extends to the fan itself. Look for Energy Star units that provide the airflow you need at lower wattage. Over a year, the power draw is small, but the real efficiency gain is in preventing damages that lead to rework. A $200 difference in equipment or ducting pales next to repainting, replacing swollen trim, or remediating mildew.
Coordinating with lighting, heating, and layout changes
Bathroom lighting design often puts recessed fixtures near the shower and a vanity light at face height. Think through the fan’s grille position so it does not compete visually with those fixtures. In small spaces, a grille aligned with a recessed trim can make the ceiling feel balanced. In wet rooms where the entire space is tiled, recessed fans with decorative grilles can blend into the field tile. If you plan heated floors, the fan’s role in humidity control still matters. Warm floors dry faster, but they do not remove moisture from the air.
Layout choices also affect ventilation. Wet room design with an open shower needs greater capture at the ceiling because steam does not contain itself behind a curtain. Frameless shower doors leak a little air at the edges, which helps the fan draw across the enclosure. If you are weighing open concept vs. traditional layouts in a primary suite, remember that an open bath to bedroom arrangement makes moisture control critical. In those cases, two grilles feeding an inline fan helps keep humidity from drifting into the sleeping area.
Budget realities and smart trade-offs
Homeowners often ask how to plan a home renovation on a budget without skimping on essentials. Ventilation is an essential. Spend where it counts: a quiet fan with a proven curve at 0.25 inches, smooth metal duct with minimal bends, an insulated run through unconditioned spaces, and a reliable exterior cap. If something needs to give, skip the built-in Bluetooth speaker and keep the humidity sensor. Cheap dampers and long flex runs look like savings until you repaint in a year.
There are hidden costs of home remodeling that show up in ventilation work too. Fishing power in a finished bath can reveal plaster that crumbles at the first cut, or tile that was installed tight to the ceiling so a small opening becomes a big one. Build a little contingency into the timeline and budget. A two to four hour estimate for a straightforward replacement turns into a day when we run a new circuit or reframe a ceiling joist opening for a larger housing. It is not waste; it is the cost of doing it right.
Revive 360 Renovations field checklist for bathroom fan upgrades
- Select a fan by delivered CFM at 0.25 inches and target 1.0 sone or less whenever possible. Map the shortest, straightest duct path with rigid duct, limit elbows, and insulate runs in attics. Choose a termination with a free-moving damper, flash and seal it properly. Provide make up air with a door undercut or transfer grille, and separate lighting from fan control. Commission after installation with a timer or humidity sensor, and verify airflow at the exterior.
This checklist grew from hundreds of jobs, from compact powder rooms to full spa conversions. The best projects treat ventilation as infrastructure rather than an accessory, and they hold up better through Chicago winters and summer humidity alike.
Troubleshooting a stubborn bath
If your mirror fogs no matter what you do, diagnose systematically. Confirm that the damper opens at the exterior while the fan runs. If it barely moves, disconnect the duct at the fan and check the fan’s output into the room. Strong flow at the housing and weak flow at the cap means the duct is the bottleneck. If both are weak, your fan is either underpowered for the static pressure, clogged with dust, or defective. Clean the wheel and grille, then retest. Measure humidity with a small digital hygrometer. If RH spikes above 70 percent during showering and takes more than 30 minutes to return to baseline, runtime is too short or airflow is too low. A timer that runs for 45 minutes after a shower can bridge the gap in a marginal system while you plan a duct upgrade.
Backdrafts that chill the room call for a better damper or a backdraft damper installed inline near the exterior termination. Install it so gravity helps it close. If you have persistent ceiling stains in winter, look for an uninsulated section of duct near the cap, or a low spot in flex where condensate collects. Correct the slope so any condensation flows outdoors.
Where bathroom ventilation intersects value and resale
For homeowners thinking about how to increase home value with strategic renovations, bathroom ventilation is not flashy, yet it affects inspection reports and buyer impressions. A bathroom that smells fresh and shows no mildew tells a story of maintenance. Energy-conscious buyers ask about fans the same way they ask about windows and insulation. During a home remodeling consultation, we often advise clients to prioritize what keeps the house healthy, then layer on finishes. The order matters. Paint and tile are simple to refresh later. Rerouting a hidden duct after the ceiling is finished is not.
When Revive 360 Renovations documents before and after transformations, the photos show gleaming tile and new fixtures, but the less visible success is a mirror that stays clear, caulk that stays white, and drywall that stays crisp. That is the return on a quiet, well-routed fan that runs when it should.
Small spaces, powder rooms, and edge cases
Powder rooms without showers still benefit from ventilation, especially in older houses where windows have been painted shut for decades. A 30 to 50 CFM quiet fan clears odors and puts the room back into circulation faster when you have guests. In tiny baths carved under staircases or tucked in basement corners, routing a duct to daylight can be the hardest part of the project. Sometimes the best route is through a rim joist to a side wall cap. Other times, a short run to a roof jack is cleaner. Watch for snow drift lines and https://garrettlhyz228.theburnward.com/small-bathroom-remodel-maximizing-space-and-style-in-chicago-condos wind exposure if you choose a roof termination in a northern climate. The right cap and a slightly steeper duct slope help prevent frost and backdrafts.
In multifamily buildings, rules can prohibit penetrating exterior walls without HOA approval or city permits. There, we coordinate with building management and sometimes tie into existing chase systems designed for bath exhaust, making sure there is a backdraft damper and a balancing plan so your fan does not pull from the neighbor’s line. This is a case where hiring the right contractor for your remodeling project matters more than a bargain price. Coordination saves headaches later.
Keeping it working, year after year
Maintenance is simple. Vacuum the grille every few months. Once a year, drop the grille, disconnect the light lens if it has one, and wipe dust from the fan wheel. Dust adds weight and makes the wheel wobble, which increases noise and reduces airflow. Check the exterior cap to make sure the damper moves freely and no nests or lint block the path. If your fan uses a replaceable motor cartridge, keep the model number handy. Five to ten years is a typical motor life in a busy bath. Replacement takes minutes when the housing stays in place.
If you ever repaint or re-caulk and notice mildew, treat it as a sign to recheck the fan performance. Look beyond the bathroom for compounding moisture sources. A dryer that vents into an attached space, a kitchen range hood that recirculates rather than exhausts, or a damp basement will raise the whole-house humidity level and make the bath fan work harder for longer.
How ventilation interacts with the broader remodel
Bathroom ventilation ties into other remodeling decisions. If you are choosing the best bathroom layouts for small spaces, leave enough ceiling real estate for a central grille and one recessed light per task area. If you want heated floors, budget a dedicated circuit and plan the fan on a separate control. If you are blending modern and traditional styles in your renovation, there are grilles with clean lines and others with classic profiles, and there are remote inline options that remove the grille from the design conversation altogether.
Timing matters within the broader project schedule. When you create a remodeling timeline that works, rough-in the fan housing and duct before insulation, then set controls and trim once the paint dries. Coordinate with the roofer to install the roof cap while the crew is on site, rather than asking a drywall finisher to climb a ladder with flashing in hand. It is a small coordination step, but it avoids a patched shingle and a questionable seal.
A final word from the field
A bathroom fan is not the star of the remodel, yet it quietly protects the stars - tile, mirrors, cabinets, and the structure behind them. The right fan, sized with delivered CFM in mind, routed through a short, smooth, insulated duct, controlled by a timer or humidity sensor, and terminated outdoors through a quality damper, is the difference between a bathroom that looks new for a year and one that feels new for a decade. After many projects, the pattern is reliable. If the mirror stays clear during a long shower, you nailed the design. If it fogs and the smell lingers, you missed something in the chain. Either way, the fix is rarely guesswork. It is a short checklist and a bit of disciplined execution, the kind of work that teams like Revive 360 Renovations bake into every bathroom upgrade.